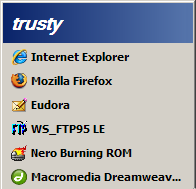
 The first tip I gave you was to use the Windows key to open the Start menu. The top area of the Start menu is customizable and it is called the Pin area. You can “pin” any application there giving you quick access to the things you use most.
You may have noticed the programs you use most are at the bottom of the start menu. Windows will keep track of the six (that’s the default number but you can change it) programs you use the most and will automatically place them there. The order of the placement is based on the number of times each program is used. More use makes the program move higher in the list. This is the “popular” list and it can change often.
If you want a “popular” program permanently placed at the top of the Windows Start menu (the Pin area), right-click the program in the Start menu and select Pin To Start Menu. If you pin a popular program it will disappear from the popular area and reappear in the pin area. Windows won’t show it in both places.
The program doesn’t have to be in the popular area to be pinned. You can pin any shortcut or executable from any part of the Start menu.
You can also rearrange shortcuts in the pinned area. If you want a certain program at the top of the Start menu, click and drag the shortcut to the location you desire.
TSPY=2.19

Pingback: Alvin’s Educational Technology Blog » Efficiency Tip #60 - Start Letter